Thursday, February 20, 2014

Vegetable Salads


Because it is so hot here in summer we love to eat salads, but I also love cooked vegetables and don’t want to miss out on them, so the obvious thing to do is make salads from cooked veggies!

For a long time now I have been making salads with roasted root vegetables like potato, sweet potato and red onion and also pumpkin, but I have only fairly recently discovered the joys of chargrilling brasiccas, namely broccoli and cauliflower….wow, what a taste sensation! Chargrilled Brussels sprouts are wonderful also (once tasted you will never steam or boil them again!) but not usually available in summer....well not where I live at any rate.

Grilled and roasted vegetable salads make an interesting and delicious side dish to go with  barbecued, grilled or roasted meat or, with a few ‘extra’ bits, can be a stand alone meal.

This broccoli salad recipe comes from Yotam Ottelenghi’s book, “ Ottelenghi, The Cookbook." I urge you to give it a go, it is a simple yet stunning combination of flavours.

Ottolengi's Chargrilled Broccoli with Chilli and Garlic 

2 heads of broccoli
115ml olive oil
4 cloves garlic, thinly sliced
2 mild red chillies, thinly sliced
Toasted almond flakes or thinly sliced lemon
Salt and pepper

Separate the broccoli into individual florets (leave stem on). Fill a large saucepan with water and bring to the boil. Throw in the broccoli and blanch for 2 minutes only. Using a slotted spoon transfer the broccoli into a bowl of iced water to stop it cooking and keep it a lovely vibrant green. Drain into a colander and allow to dry completely. Toss the broccoli with a couple of tablespoons of the oil and season well with salt and pepper.

Place a ridged griddle pan (or BBQ plate) over high heat and leave it to get very hot. Grill the broccoli in batches until it is charred all over - don't cram the pan. Transfer to a heatproof bowl.

While grilling the broccoli place the rest of the oil in a small saucepan with the garlic and chilli and gently warm them until the garlic just begins to turn golden. Be careful not to burn the garlic or you will have to start again as burnt garlic is very unpleasant. Pour the oil, garlic and chilli over the broccoli and toss together. Taste and adjust seasoning if necessary. Garnish with almonds or lemon just before serving. If using almonds I suggest serving with a wedge of lemon on the side.

Serve warm or at room temperature.

Emma's Optional Extras

Crispy fried proscuitto
Crumbled feta

There is a multitude of cooked vegetable salad recipes on the internet so, if you are in a bit of a funk about what to serve with your steak or chops tonight, have a look at the vegetables in your fridge (or pantry for spuds and onions) and google that ingredient + salad recipe...you are bound to find an interesting way to serve it. Or you could just make something up! I think it's important to add a bit of green to a salad and baby spinach, rocket and soft herbs are all useful for this. A basic dressing of olive oil and vinegar or lemon juice with a pinch of salt and a hint of honey or sugar works well with most salads.

Do you have any fabulous veggie salad recipes to share?

Sunday, February 02, 2014

Gobble Guts!

Years ago sticky baked turkey wings made a regular appearance at our table because, apart from being really delicious, they were incredibly cheap at just $2 a kilo. Then, for reasons unknown to me, they just  disappeared from the meat section of our 'local' supermarket and I hadn't seen them again.....until about 3 weeks ago. I was so excited I nearly did a little dance in the shop!! They have doubled in price since I bought them last but the new ones are from a free range farm so I am happy to pay more and, let's face it, $4 a kilo is still very cheap! 

Another good thing about cooking turkey wings this way is that they are very quick and easy to prepare before being popped in the oven for a slow bake. If you like you could make the marinade in the morning, leave the wings steeping in it while you are at work, and when you get home put them on to bake for a couple of hours, to be ready in time for dinner. I like to serve them with fried brown rice made with lots of veggies, but they also go well with plain steamed rice and veg or salad on the side.

I don't like to light the oven in the kitchen here in summer (at 30 degrees with the air con on, it is quite hot enough thank you!) so, when it comes to baking meat I do it all in the barbecue and I find it works really well. I just put the tray on one side of the barbie and light the burner on the other side, then close the lid and monitor the temperature now and then. I turn the tray around about half way through the cooking time.

When baking any meat with sugar in the sauce I always line the tray with baking paper. This way you 
get to keep all the sauce rather than it sticking to the pan and, more importantly, the tray is easy to wash!

This recipe makes a lot so please adjust the quantities according to your needs...but I might add that it's worth cooking extras of these as they make great lunchbox fillers!

Ingredients

8 turkey wings, jointed into 2 pieces

Marinade
1 cup light soy sauce
2 tablespoons honey
1/3 cup sweet chilli sauce
2 thumbs of fresh ginger, grated finely
4 cloves garlic, crushed or grated finely (I use a microplane grater for ginger and garlic)
1/2 teaspoon Chinese five spice
2  whole star anise (this is quite a strong flavour and if not to your liking it can be omitted)
Peeled rind and squeezed juice of one orange
1/2 cup of water 

Method
Mix all the marinade ingredients together. Put the wings in a large bowl and pour the marinade over them. Cover and sit in the fridge overnight or for as long as you have. 

Preheat the oven (or barbecue) to 160 degrees Celsius. Line a tray (large enough to hold all the wings in a single layer) with baking paper. If a single sheet is not big enough to go up the sides of the tray then use two sheets folded together along the centre line a few times and then open out. 

Place the wings in a single layer in the tray and pour the marinade over them. Cover the tray tight with foil and place in the oven.

Bake at 160 deg for about 1 1/2 hours then take out and remove the foil. Turn the wings over in the sauce.

Put the tray back in the oven, turn the heat up to 180 deg and bake for another 1/2 an hour, or until the wings are a lovely burnished colour and the meat is coming away from the bone. 

These really are finger lickin' good but finger bowls might be a good idea!

This same recipe can be used with pork ribs.
I cooked 8 wings in this big tray. That's 8 big pieces
and 8 smaller pieces. This photo only shows half
the tray. It was enough for dinner for 6 and lunch
the next day.


And while we are on the subject of turkeys.....I killed the last of my turkeys the other day. I have been putting it off, thinking I might keep her, but I think she was a bit lonely and also she was annoying the chooks by pecking at them and dominating over the scraps from the chook bucket.

It is a little bit older than is ideal for eating but, rather than roasting, I will probably cut up and braise her slowly. I will make pate from the liver and add the heart and giblet to the carcass for stock. I will then hide in a corner and eat the giblet, sprinkled liberally with salt and pepper, all by myself!

Have you got any good turkey wing recipes?


Thursday, January 16, 2014

A Heap of Compost

Putting the worms back in the farm after
taking out the bulk of the worm 'poo.' 
I have recently tipped out the worm farms to extract the worms from the rich, nutritious plant food they created. The problem is that there were so many tiny baby white worms I can't bring myself to put it on the garden for fear of all the lost potential! Instead, I am going to 'seed' the magnificent compost heap my son Tom has made...when it has finished composting and is moved to some shade in the garden.

I must tell you about this compost. A couple of months ago Tom and Rossco (hubby) did a concrete contract at a cattle station up the road which involved the loader and the truck. Having unloaded the bulk bags of cement etc there was space on the back of the truck and, fortunately for us, the station people had recently cleaned out their cattle yards, creating a huge pile of manure mixed with hay and a bit of dirt. Tom asked if they would like some help to remove the pile, to which the answer was, "Yes!" He promptly transferred three loader buckets full on to the back of the truck.

We contemplated using this manure on the garden as is, but then came up with the inspired idea of mixing it with scrapings from the sheep yards (more broken down hay and sheep manure), rakings from the chook yards and the large pile of dry debris (leaves, grass clippings etc) from the garden that had accumulated over a couple of years.

A few years ago we bought a special loader bucket for mixing cement, sand, aggregate and water into concrete.
We discovered that shire councils also use them for mixing compost. So, here (left) is Tom adding water  while the auger inside the bucket churns the mix. On the right is the lovely dark, damp pre-composted mixture, before being tipped out and added to the pile. (below left)

Tom has been turning the pile with the loader about every six or seven days, spraying with water when it gets a bit dry on the surface. It is starting to cool down now but at its peak the internal temperature got up around 70 degrees, which hopefully killed any weed seeds.

I love this gardening with machines business! Imagine trying to make this quantity of compost using a spade. It'd be a Herculean task. You could do this on a smaller scale using a normal cement mixer. A compost pile only needs to be about a cubic metre to get nice and hot in the middle.

I am really excited about having such a great quantity of compost to use on the veggie garden this year. Normally I just use straight sheep manure, spread about seven centimetres thick on top of the bed and then dug in. And now that we have meat sheep rather than merinos our sheep manure supply under the shearing shed is getting scarily low.  Actually we haven't got many sheep at all now, having had to sell nearly all of them due to the impact of wild dogs and drought.

On the right is the whole pile, about 6 weeks or so into the composting process. It's hard to get perspective on the size of it without a person or machine standing next to it but it is about as high as me.... 5'7".

So, watch this space. At about the end of March I will start the veggie garden up for winter and I can't wait to plant some seeds into this beautiful stuff!

Tuesday, December 31, 2013

Christmas Fare

Happy New Year Everyone!

We had a wonderful family Christmas, with 18 people staying here in the homestead. A bit of planning goes in to catering for that number of people over  four days, especially when the nearest shop is 100km away.  I have to say that we ate very well, and I am very grateful to have a coolroom! Fortunately all the girls in the family are  very capable and enthusiastic cooks.....we have to keep reminding each other  to 'keep it simple' as there is a bit of tendency to get carried away with the gourmet creations!

It's a given that it will be hot here at Christmas so lighting the oven is definitely not a good idea. For lunch on Christmas Day we shared a homegrown turkey roasted in the normal BBQ and a leg of our own pork, roasted in the Webber kettle BBQ. Both were magnificent. I'm afraid I don't 'do' traditional stuffing for the turkey. I prefer to jam fistfuls of fresh herbs, cloves of garlic  and  halves of lemon in the cavity of the bird, all of which impart lovely flavour and, importantly with turkey, moisture. This bird took about 2 hours to cook at a pretty high temperature, and half an hour to rest. The skin, which I rubbed with a cut lemon, rubbed with olive oil and sprinkled liberally with salt, was crispy and delicious and the meat was tender and juicy. I know a lot of people think turkey is a dry meat, and maybe factory farmed turkey is, but homegrown and cooked well it is superb.

I'm sure some of the boys in the family would have been happy just to eat pork and turkey for lunch but we did also have some yummy salads.
The one in the foreground of the photo is made with freekeh, which is cracked green wheat, roasted. It is a delicious and interesting alternative to rice or pasta and can be used hot or cold, plain or mixed with other ingredients. We made a salad with herbs and cherry tomatoes from my garden, cucumber from my step mum's garden and red cabbage from a friend's garden as well as chickpeas and a few other ingredients.  We also had a fresh garden salad, a spinach, roast pumpkin and feta salad and a simple but delicious potato salad made with steamed kipfler potatoes, hard boiled eggs, parsley and homemade aioli.

Our Christmas dessert is usually centred around ice-cream and this year it was Pina Colada flavoured (think coconut, pineapple and rum) and rolled in a toasted coconut crumb, served with a pineapple salsa and a mango and homegrown passionfruit salad. Very tropical and a perfect ending to lunch on a hot day. See the (very easy) recipe at the end of this post.

My sister in law Pam, adding rice to the
paella, cooked in the giant wok on
 the back lawn. I'm stirring.
On Boxing Day we enjoyed cooking and eating Paella (a Spanish seafood and rice dish) on the back lawn. Years ago my Dad made the best outdoor cooking contraption I've ever used....he's pretty clever my Dad. Many years before  I had given Dad a giant wok to sit on his Webber BBQ but, due to the effort of having to light heat beads and so on, he had used it only rarely, so he went about making a gas burner for it. The body of it is custom made from rolled iron and the circumference is the same as a Webber. The flame comes from a standard four ring gas burner bought at a camping supplies store. The base is flat steel.  Of course you can also use pots, frying pans and even camp ovens on the burner, all of which I have done. I reckon I would use this burner about 3 times a week on average and it is brilliant for outdoor entertaining. Our paella, cooked in the wok, fed twenty people with leftovers, but it  can be used to do a stir-fry for two if you wish to.


Pina Colada Ice-Cream - From ABC's delicious. magazine Dec 2013/Jan 2014

3  cups (720g) sour cream
2 1/2 cups (375g ) pure icing sugar, sifted * (300g for the ice-cream and 75g for the coconut crumb)
440g can crushed pineapple, drained
125ml coconut cream
100ml Malibu or other coconut liqueur
2 1/2 cups (245g) shredded coconut, toasted
1 tsp cinnamon *
Mint leaves, to garnish

*I used 200g of icing sugar (150g for the ice-cream and 50g for the crumb) and it was sweet enough for our taste. I omitted the cinnamon as I felt it didn't really fit the flavour profile.

Pineapple Salsa

1 lemongrass stalk (inner core only) bruised (if you don't have lemongrass use a couple of strips of lemon peel)
10cm piece (50g) ginger, peeled and chopped
150g caster sugar
4 kaffir lime leaves
1/2 a fresh pineapple, peeled cored and thinly sliced

To make the ice-cream whiz the sour cream, 2 cups (300g) of icing sugar, crushed pineapple, coconut cream and Malibu in a food processor to a smooth puree. Transfer to an ice-cream machine and churn. (Alternatively, pour into a shallow container and freeze for 2 hours, or until frozen at the edges. Remove from freezer and beat with electric beaters. Return to freezer. Repeat 2 or 3 times)  Transfer to a 1.75 L terrine (or load tin) lined with plastic wrap and freeze overnight or until firm.

For the pineapple salsa, place lemongrass, ginger, caster sugar, kaffir lime leaves and 1 cup (250ml) of water in a saucepan over low heat. Cook, stirring, for about 2-3 minute until the sugar dissolves. Add pineapple and cook for 5 minutes or until tender. Remove pineapple with a slotted spoon and set aside. Return pan to heat and cook syrup for a further 5-6 minuted until reduced by half. Discard solids and pour over the pineapple and chill until ready to serve.

To make the crumb, place coconut, cinnamon (if using) and remaining icing sugar in a food processor and pulse to combine.

Remove ice-cream from freezer 5 minutes before serving. Uncover and invert onto a plate, gently pulling on the plastic wrap to remove ice-cream from pan. Slice into thick slices, then roll the thin edges of each slice in the crumb. If too fiddley just sprinkle on top of the slice.

Serve immediately with pineapple salsa and garnish with mint leaves.  (We actually folded finely chopped mint through the pineapple salsa) The mango and passionfruit salad was our own extra addition.


And just for your enjoyment here are some photos of a couple of visitors to the garden.

The Splendid Fairy Wren lives in the garden with his harem of ladies, regularly flitting under the sprinklers to cool off.


And one of several Monitor lizards, or Bungarras as we call them,  that amble around like small dinosaurs. They can get very quiet  and quite cheeky, coming inside to steal the cat food if they get a chance. However, they are quite effective at keeping snakes away which is a good reason to encourage them!

Thanks to my nephew Douglas for all the photos!


Wednesday, December 04, 2013

Zucchini Solutions

It's been a bit long since my last post, I'm sorry. This past week I've been producing the quarterly newsletter for the Isolated Children's Parents' Association of WA, a volunteer group that lobbies for access to appropriate education for rural students, so most of my computer time has been taken up with that. I was away the week before that.

I've been picking heaps of peaches over the last couple of weeks and they probably only have ten days to go before they are finished. We've eaten them mostly fresh, but of the ones that have been damaged by rubbing on the tree or by insects, I've cut the 'bad' bits out and sliced the rest into a plastic container to either cook with or put on top of our breakfast cereal.

Julia, my son Tom's girlfriend, made Belinda Jeffrey's Gooey Butterscotch Peach Cake from her book, Mix and Bake and it was a scrumptious dessert, served with homemade custard. Belinda is my absolute favourite cake cook and her recipes are always winners. For some unknown reason we didn't take a photo.

As I said I went away for a few days and, as they sometimes do, one of the zucchinis grew, unnoticed, into a monster! This is half of it next to a cherry tomato. The first half went into making this lovely, moist, reluctant-vegetable-eater-tricking cake.

Zucchini Chocolate Cake

3 eggs
1 cup sugar
170 g butter
1/3 cup milk
1 teaspoon vanilla
2 cups grated zucchini
375 g plain flour
1/2 cup cocoa
2 1/2 teaspoons baking powder
1 teaspoon cinnamon
1 1/2 teaspoons baking soda

Beat the first five ingredients for 3 minutes on medium speed in an electric mixer. Add the zucchini and mix through. Stir in the sifted dry ingredients.
Pour into a 24cm round springform tin and bake at 160 deg C for about an hour, depending on your oven. Cool 5 mins before taking out of the tin. Leave to cool completely and ice with chocolate icing if desired.


The second half I made into these zucchini fritters. Lovely and crisp on the outside and soft in the middle. Fritters are eternally popular with men and children in my experience.....even vegetable ones!
You could serve them with a salad for a meat free meal, or do as we did and have some barbecued lamb chops alongside.

Zucchini, Corn and Feta Fritters

Mix together:


2 cups grated zucchini
1 x 420g tin of corn kernels, rinsed. Or better still you could strip a cob or two of fresh corn.
2 spring onions, finely sliced
150 g crumbled feta
1/2 cup grated parmesan
3 beaten eggs
100 g plain flour
1 large clove crushed garlic
3 tablespoons chopped fresh mint
finely grated rind of 1 lemon
Finely chopped red chilli - to taste (optional)
Salt and pepper

Heat a frying pan and add enough oil and a bit of butter to cover the base. Spoon ladles-full of mixture into the pan and gently flatten so that the fritters are the same thickness all the way through. Cook over medium heat until one side is nicely brown and crisp, then flip and cook the other side.

This mixture should make about 10-12 fritters.


Wednesday, November 20, 2013

My 'Ratatouille Garden'

As I have just picked the first zucchini for the season, and last year's eggplants are fruiting again, also the capsicums, I thought I should tell you about what I call my 'Ratatouille Garden.' I started this garden in the orchard last year with eggplant, capsicum and tomatoes. This year I left out the tomatoes and planted zucchini instead....didn't really need any more tomatoes!

Capsicum, eggplant and zucchini growing happily
together under shade in the 'ratatouille garden' 
Before last year I hadn't had much luck growing eggplants because I'd only tried the normal big ones and the grubs burrowed in to them before they were ready. Last year I planted the slim, Lebanese variety and it seems that they mature before the bugs hit them too hard, and as a bonus they are quite prolific.

I have also tried to germinate some Thai Pea eggplant seeds without success. If anyone has any tips on how to get these going I would be very grateful because I have never seen seedlings of this variety in the nurseries in WA, and I've never seen the actual fruit being sold in shops. In fact, I've never even eaten pea eggplant but I'm very keen to try them. According to the seed brochure they are very prolific.

My son's girlfriend and I had a boy free night this week which meant we could cook what I call, 'chick food.' This usually means a vegetable salad containing pulses of some description, and in this instance it was  chickpeas - combined with roasted capsicum, grilled zucchini, grilled eggplant, chopped herbs and feta. I don't have exact measurements for this salad, and its not that important, but it goes something like this:

Ratatouille and Chickpea Salad

1 tin of chickpeas, rinsed
1 zucchini, sliced length ways about 3mm thick
2 Lebanese eggplants, halved length ways
1 red capsicum
10 cherry tomatoes, halved
8 shallots or pickling onions
100g of feta cheese
1/2 cup of pitted black olives, halved
a couple of tablespoons each of chopped parsley, mint and basil
Olive oil for brushing vegetables
Salt and pepper to taste (do this after you add the dressing because the tamari is salty)


Dressing: 

Combine the following ingredients;

2 tbsp olive oil
1 tbsp balsamic vinegar
1 tbsp tamari or soy sauce
1-2 cloves garlic, crushed (or grated on a microplane which is how I always do it)

Brush the strips of zucchini with oil on both sides and cook on either a griddle pan, BBQ plate or frying pan. Cut into 2cm cubes. Do the same with the eggplants. Peel the shallots but leave whole. Cook, covered,  over low heat with some olive oil and butter until they are soft and caramelised. This will take about 10 minutes, or a bit more depending how big they are.

Blacken the capsicum skin either over flame or in a hot oven. I use a camping toaster on the gas stove for this as it is quicker than in the oven and allows more control than over a bare flame (see left). Once black all over pop into a sealed plastic container to sweat and cool....after which the blackened skin will peel off easily, leaving you with  lovely soft, sweet flesh. Cut the flesh into 2cm squares.
The capsicum sweating
in a plastic container

Combine the cooked vegetables in a bowl with the chick
peas, crumbled feta, olives, herbs and tomatoes. Pour over dressing, season and serve. This is a yummy vegetarian meal but would also be delicious with  grilled or barbecued lamb chops.

PS, This dressing sounds a bit weird but trust me, it is delicious and works really well with the salad.


Now this has nothing to do with ratatouille but I just had to show you my peaches :)  Until today we had one ripening about every two days but today there were seven! including the first white one from the other tree. I don't think there will be any recipes for peaches, they are just so perfect to eat straight off the tree. This is the tree's second summer and I am thrilled with the size and flavour of the fruit.  I estimate that I would have pulled about 120 little green fruit off this tree in order for it to support the remaining ones to reach a reasonable size. It hurt at the time but, a bit like childbirth, it was worth it in the end!


And while I'm at it, I took a photo of this impressive string of passionfruit this evening also.


Sunday, November 10, 2013

Tomatoes and Feta - a delicious combo!

At least ten years ago I planted some Tommy Toe tomato seeds I bought from the Diggers Club and I have never needed to buy  them again! Forever since they have popped up around the garden and occasionally one gets a real strong hold and the next thing you know I am overwhelmed with cherry tomatoes.

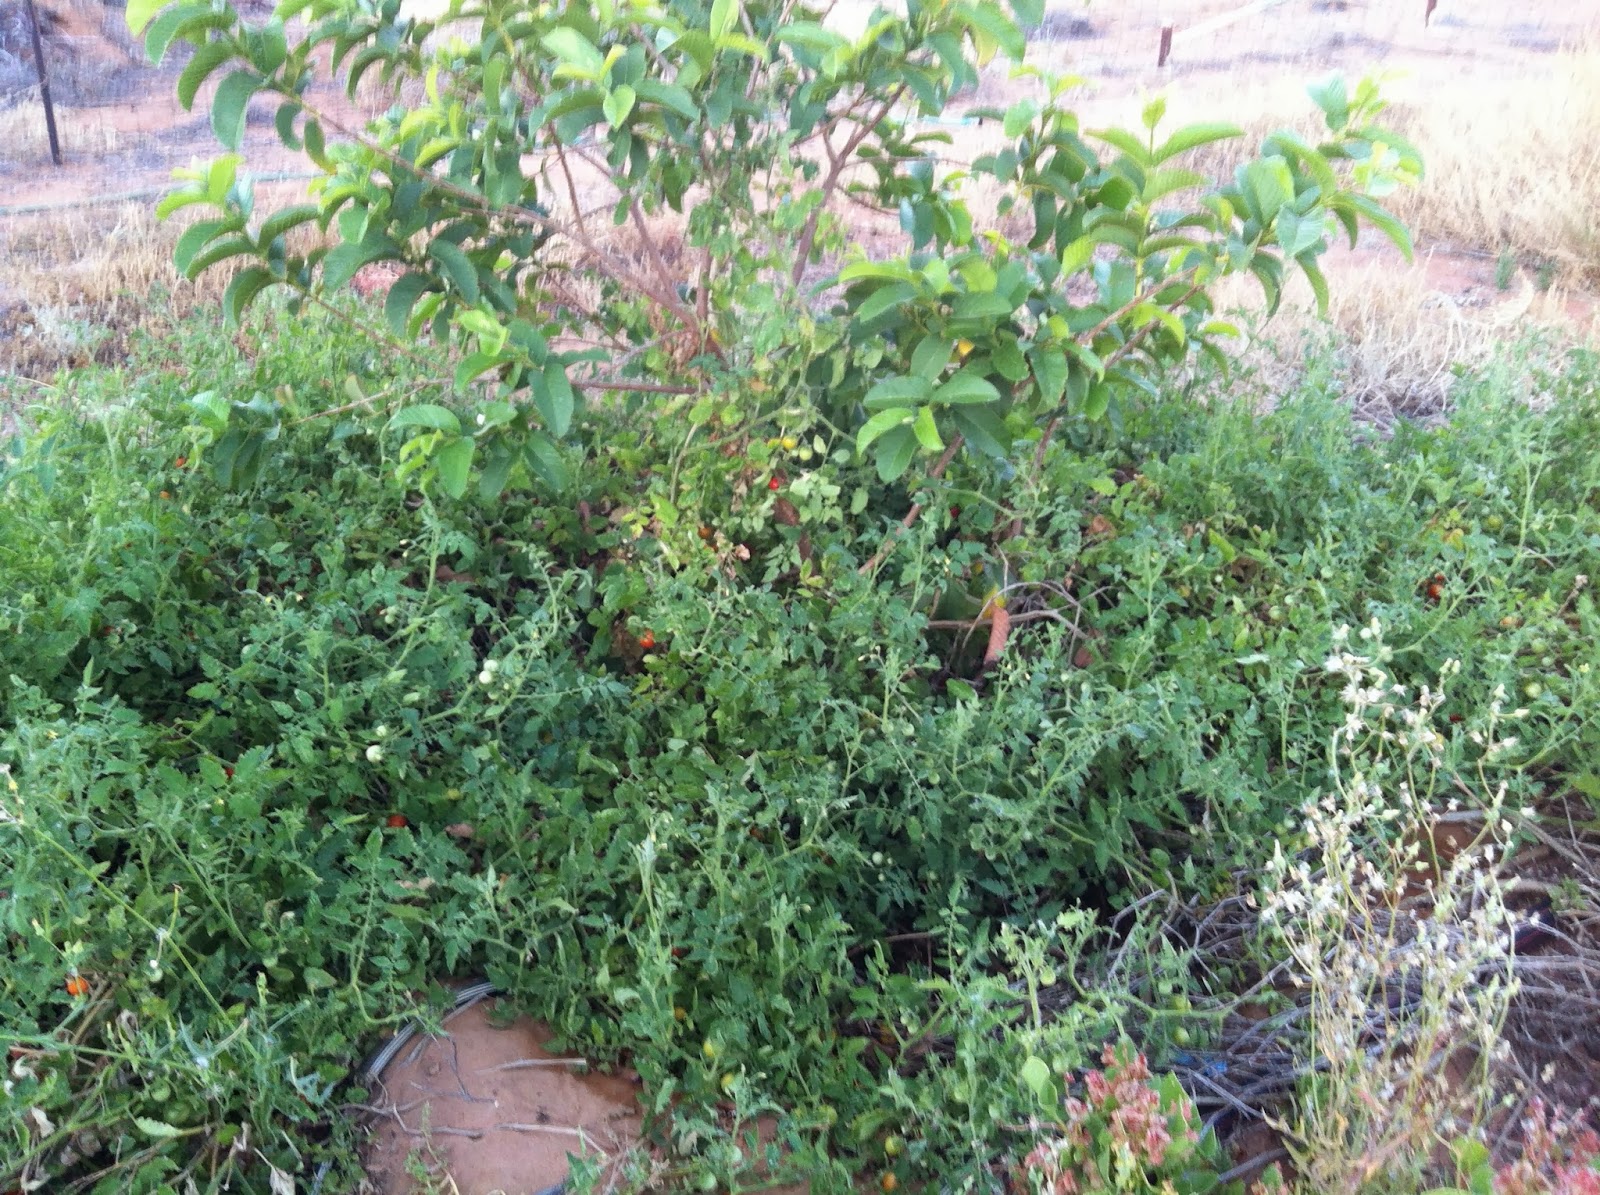
My rather spread out cherry tomato
growing happily under the guava
Why is it that self sown plants seem to do so well?  I guess its because they have chosen where they are happiest to grow. One big, feral tomato bush has chosen to grow under the guava tree in the orchard and as the guava doesn't seem to be suffering I have let it be. It may be that the guava is enjoying having its roots shaded by the tomato? In any case, the guava is covered in buds and flowers so it obviously doesn't mind sharing it's space too much.

I think over the years my seed stock must have adapted to this climate because the two plants that are currently producing prolifically are coming in to their third summer and show no signs of slowing down. In fact, apart from a very short spell in August, I have been picking tomatoes all year.

Some of this week's harvest
This is of course a good problem to have, after all a woman with tasty, homegrown tomatoes in the middle of winter has many friends! Right now however there are so many I am literally forcing them on all passersby that happen to call in. I was even thinking about putting some at the end of the drive with an honesty box...that thought lasted about as long as the tomatoes would sitting in the sun on a 42 degree day! Of course, one can make chutney and relish and tomato jam etc etc etc but cutting up cherry tomatoes is fiddly and time consuming and besides, eventually one runs out of vinegar and sugar.

My latest favourite snack (yes, I admit it's a pretty substantial 'snack') is  marinated feta and  cherry tomato halves on a piece of toasted homemade sour dough bread and seasoned with lots of salt and pepper. If I'm feeling particularly motivated I pop outside and pick some basil and/or mint to top it off (there's those herbs again). I have to say, it is pretty delicious.

But back to the homemade feta. During mustering back in September Shelley, a local lady who keeps a milking goat, very kindly sent me (via another friend with a car fridge) 6 litres of freshly frozen goat's milk. I didn't have time then to make cheese so I stored it in the freezer until last week when I was motivated by this blog, Eight Acres,  to pull it out and have another crack at making what is probably my favourite and most used cheese. 'Liz the Farmer' that writes Eight Acres, shared a link to The Little Green Cheese, a blog by urban 'farmer' Gavin Webber, who has written a little ebook on cheese making at home. I was pretty impressed with Gavin's simple approach to cheese making and bought and downloaded his ebook, Keep Calm and Make Cheese.

Not a great photo of my marinated feta
I've made feta before but wasn't overly pleased with the results as it was not firm enough. This time, following Gavin's recipe, it is perhaps a bit too firm but I prefer it like that than too soft. Next time I make it I think I will use the same recipe and method but with a bit less rennet.  As a side note, while I was making the cheese I checked three separate references and they all asked for  different milk temperatures and different stirring and setting times, which leads me to think that there is a lot of 'grace' in cheese making and one shouldn't get too hung up about it!

You don't need a friend with a cow or goat to make cheese, you can use shop bought milk. Non-homogenised milk is best and is even available in some supermarkets. In the past I have bought non-homogenised milk from farmers' markets.....am so tempted to get a cow though! You can buy cheese making kits online.

If you've ever had the urge to make cheese but thought it was too hard, I reckon you should give it a go. If you can follow a recipe, you can make cheese.